When migrating from Azure DevOps to GitHub, one of the most challenging tasks is importing work items as GitHub Issues. While Personal Access Tokens (PATs) work well for individual migrations, organizational migrations often require a more professional approach using GitHub Apps.
I’ve been developing adowi2gh, an open-source CLI tool designed specifically for importing Azure DevOps work items into GitHub Issues. With the recent release of version 0.1.0, the tool now supports GitHub App authentication, enabling better organizational control and attribution.
Why use GitHub Apps for work item migration?
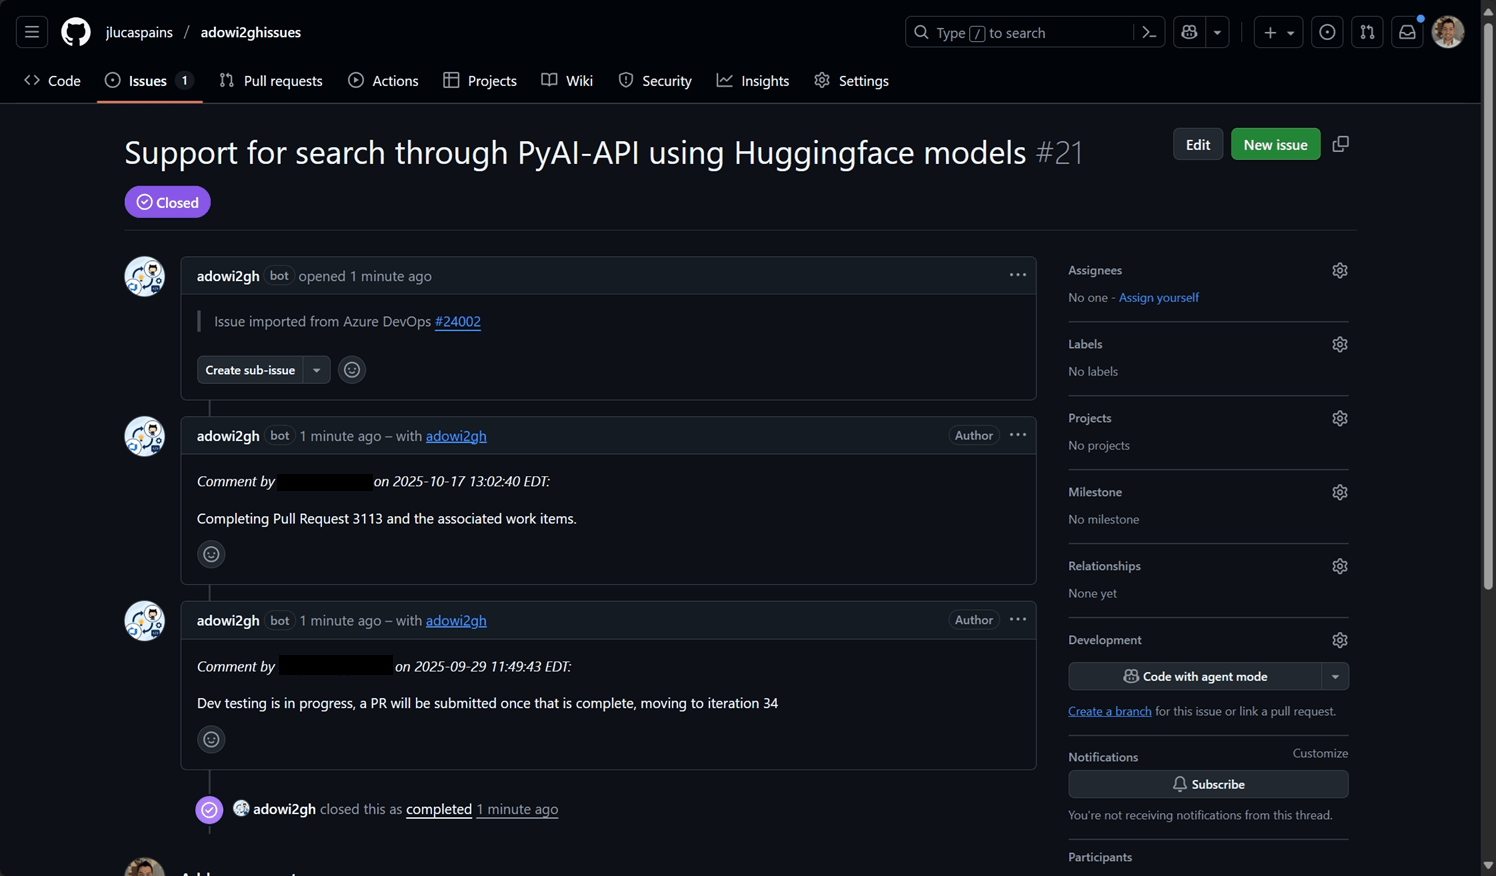
When you use a Personal Access Token for importing work items, all created issues and comments are attributed to the personal account of the PAT:
This approach has the following limitations in organizational contexts:
- Attribution confusion: All imported issues appear to be created by your personal account
- Permission dependencies: The migration depends on your individual access rights
- Audit trail concerns: Organizational activity appears tied to personal accounts
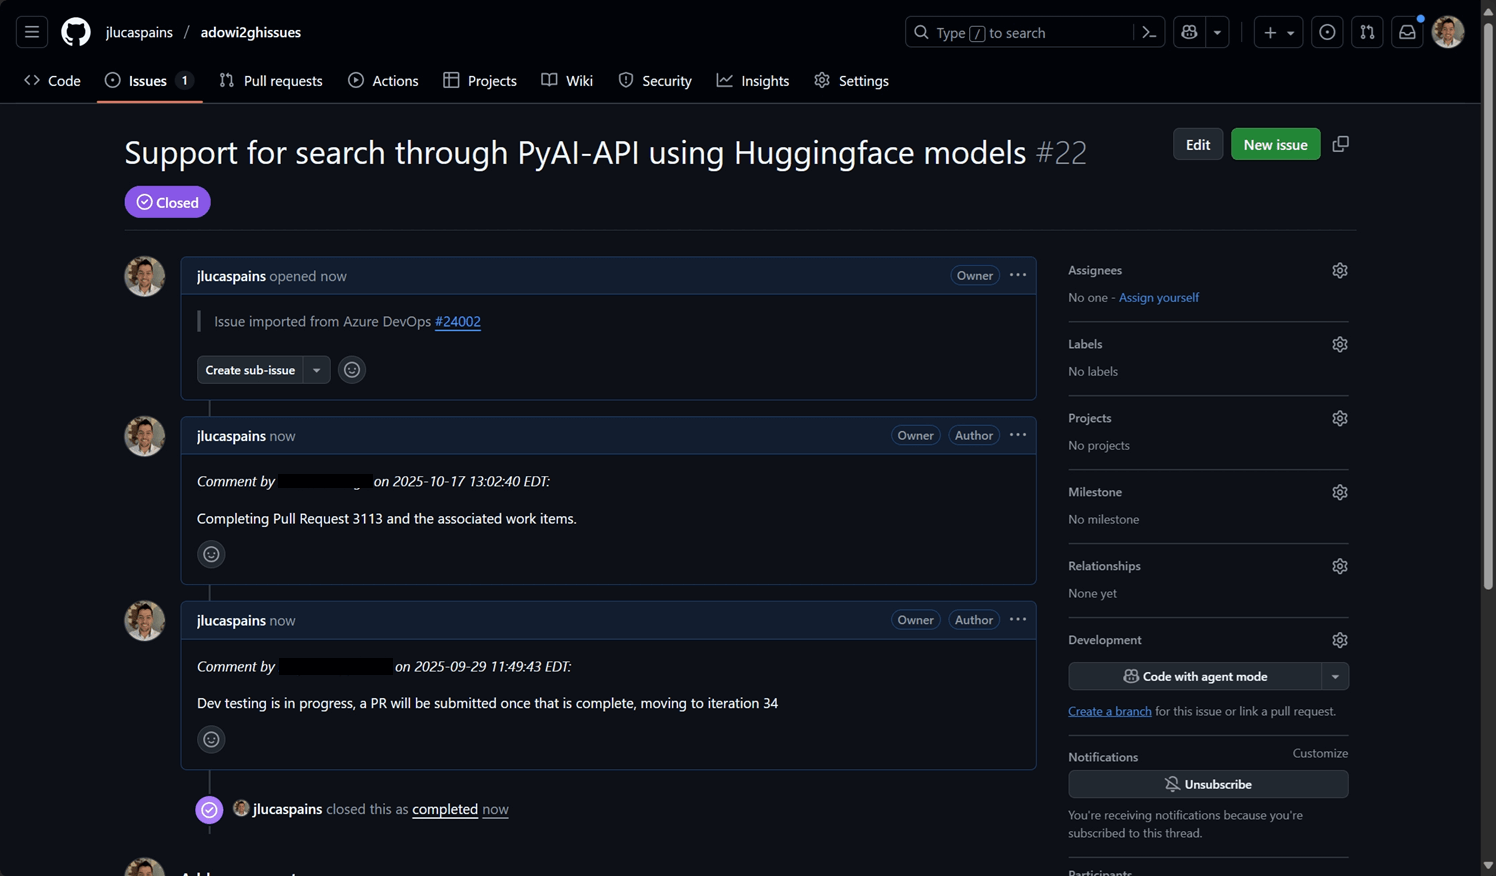
GitHub Apps solve these problems by:
- Creating issues under a dedicated app identity
- Operating independently of individual user permissions
- Providing clear organizational attribution for automated processes
- Enabling better security and access control
Setting up a GitHub App for adowi2gh
Follow these steps to create and configure a GitHub App for work item migration:
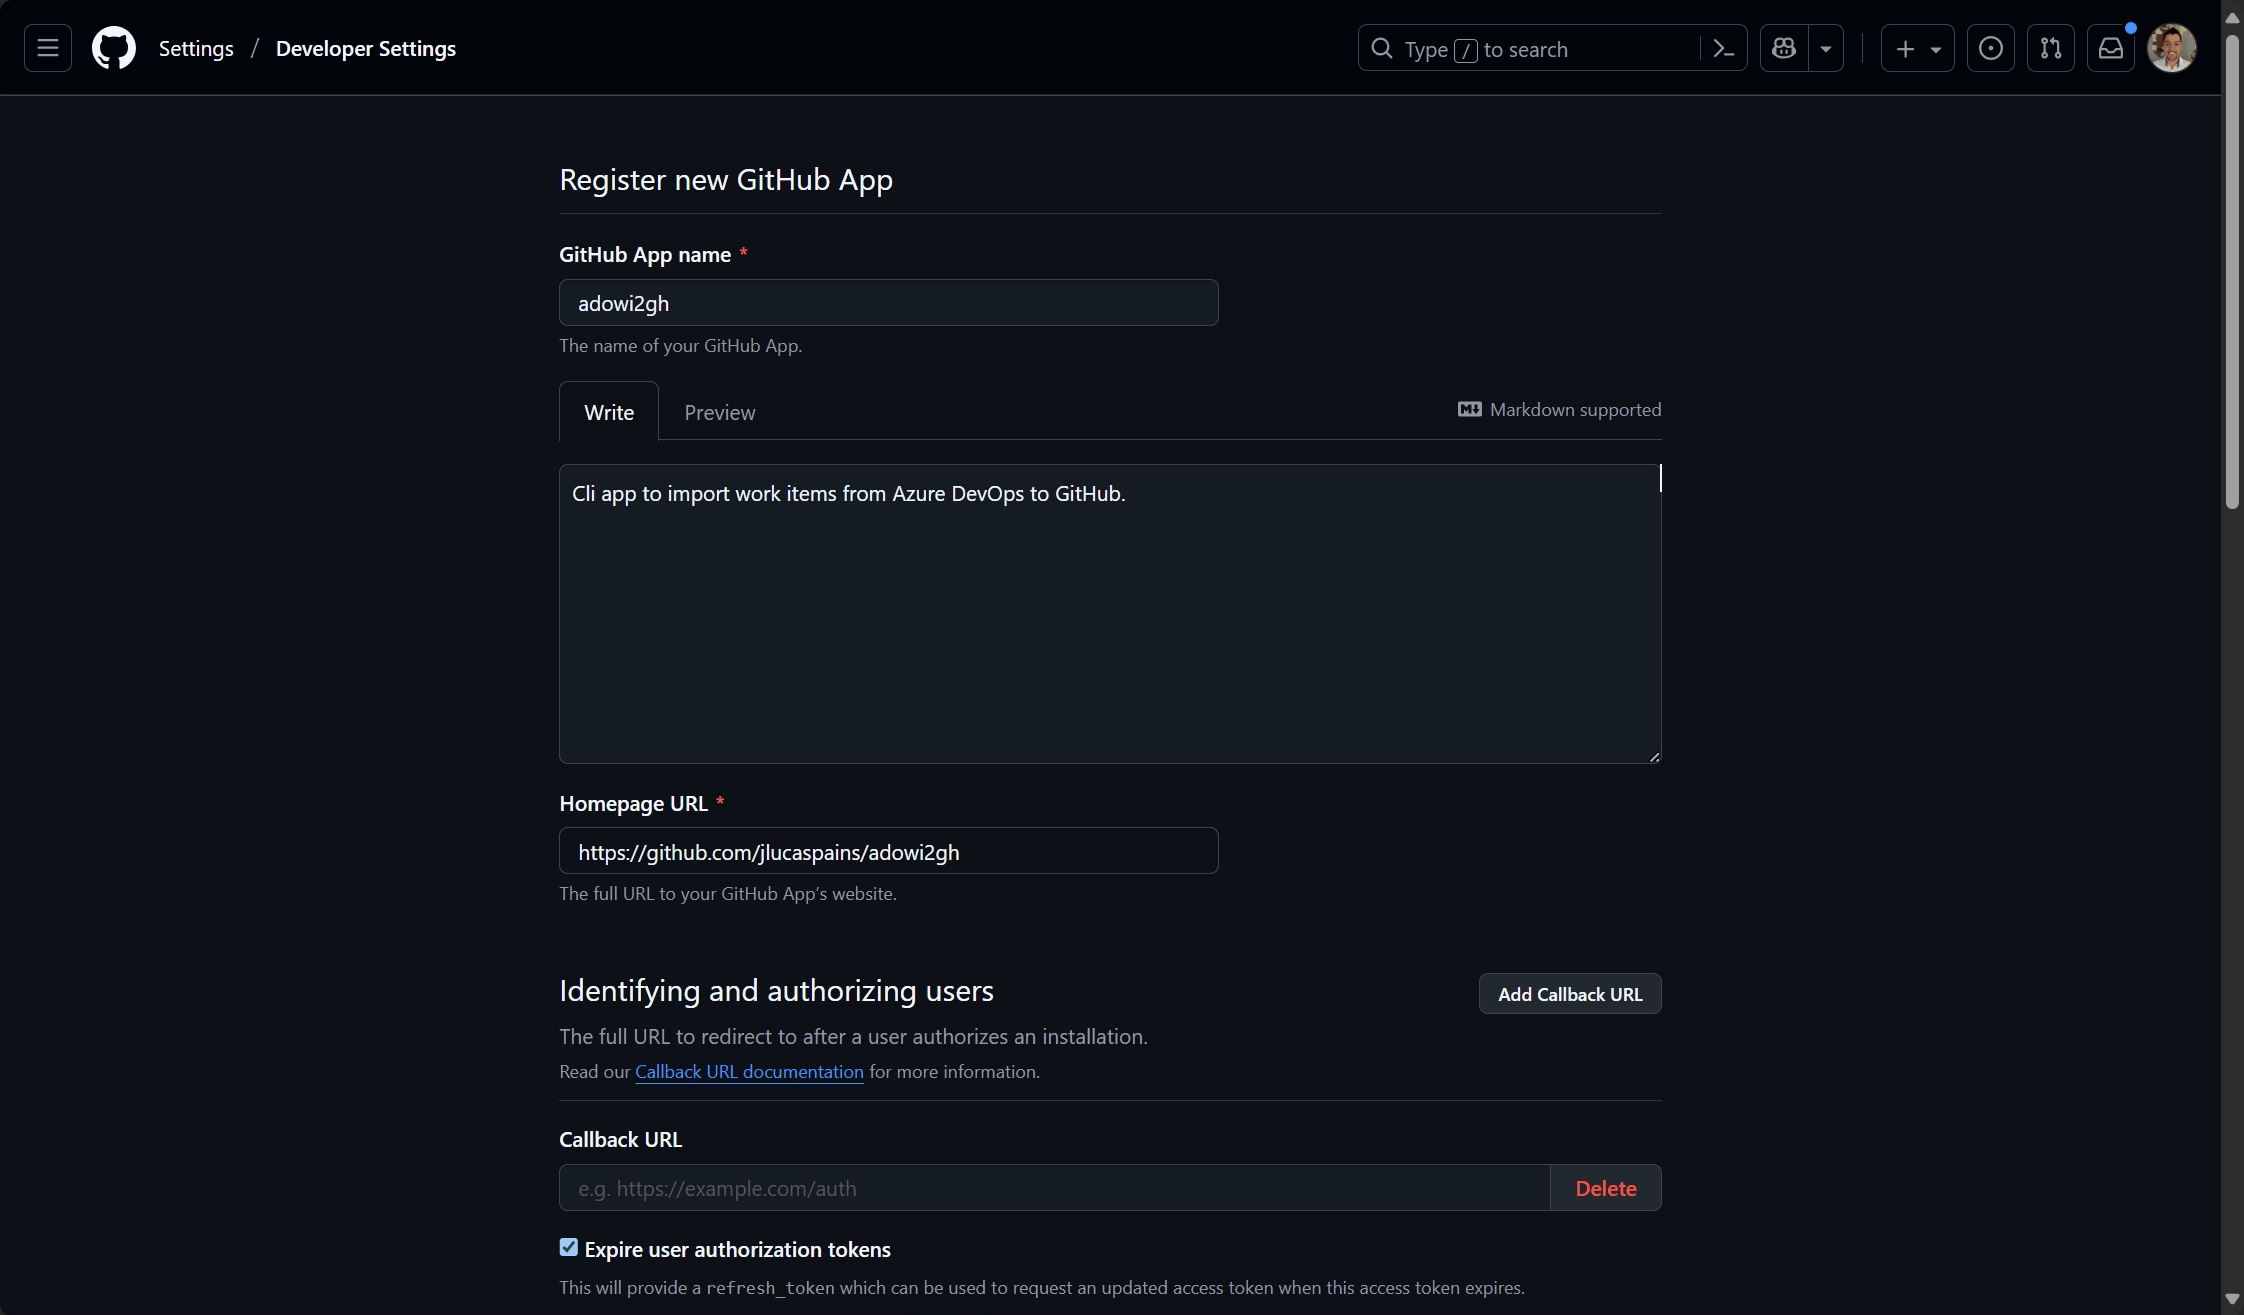
1. Create a GitHub App
Navigate to your organization’s or personal account’s Developer settings and create a new GitHub App:
- Click “New GitHub App”
- Fill in the required information:
- App name: Choose a descriptive name (e.g., “ADO Work Item Importer”)
- Description: Brief description of the app’s purpose
- Homepage URL: Can be your organization’s website or the adowi2gh repository
Pro tip: Upload a custom icon for your app. If you don’t provide one, GitHub will use the app creator’s avatar by default.
2. Configure app permissions
Your GitHub App needs specific permissions to create and manage issues. Configure the following permissions in the app settings:
- Repository permissions:
- Issues: Read & Write (required to create and update issues)
- Metadata: Read (required for basic repository access)
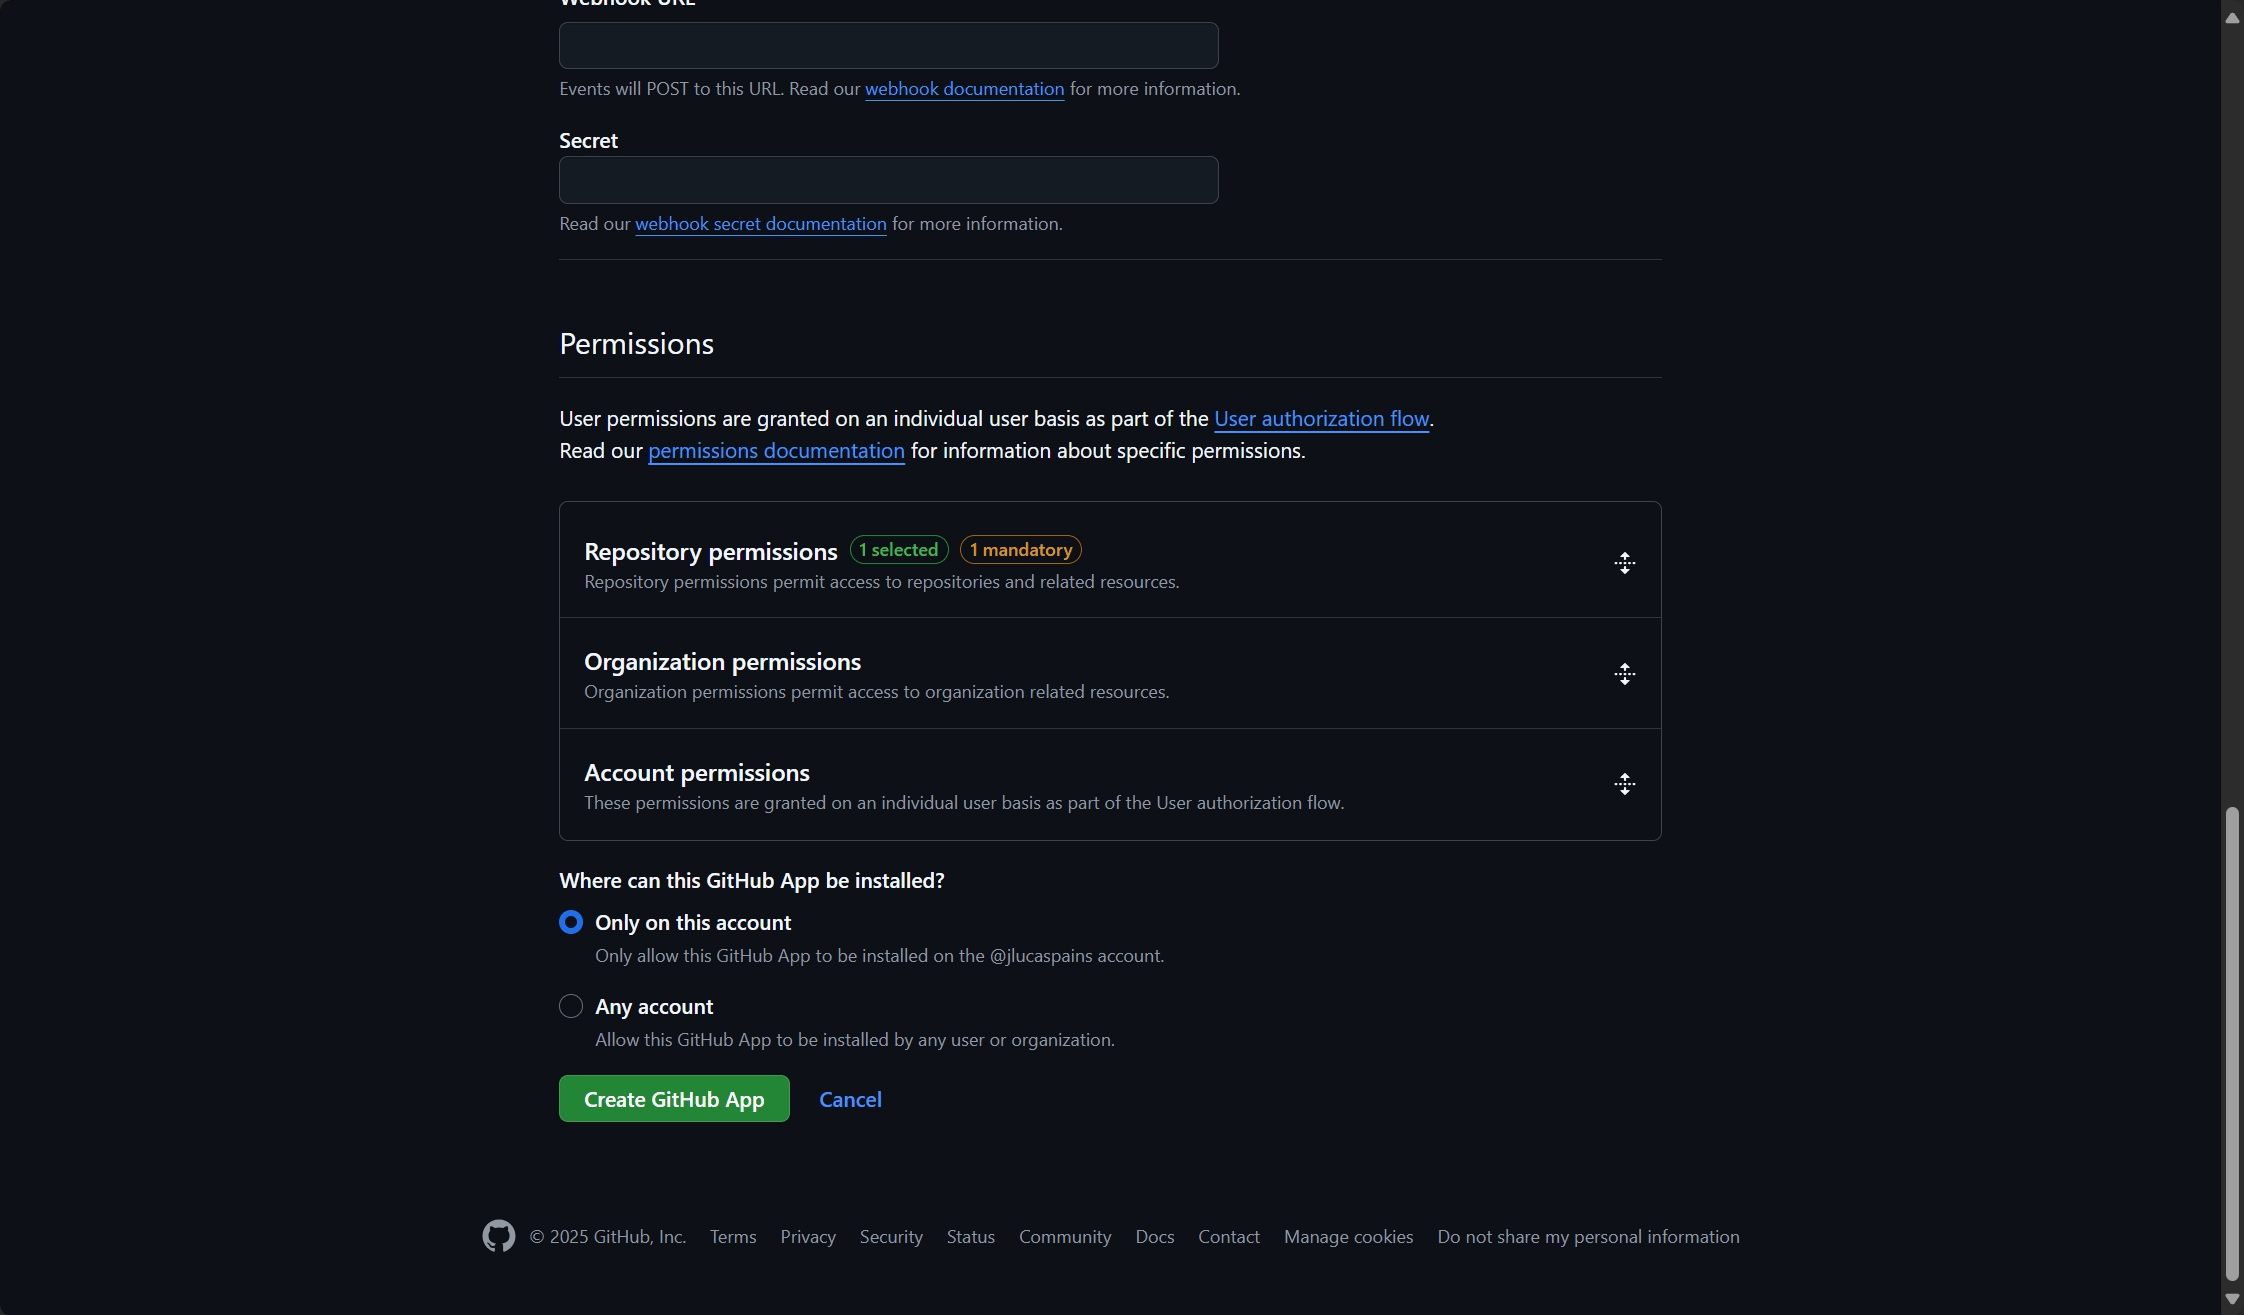
For more information about GitHub App permissions, see GitHub’s App permissions documentation.
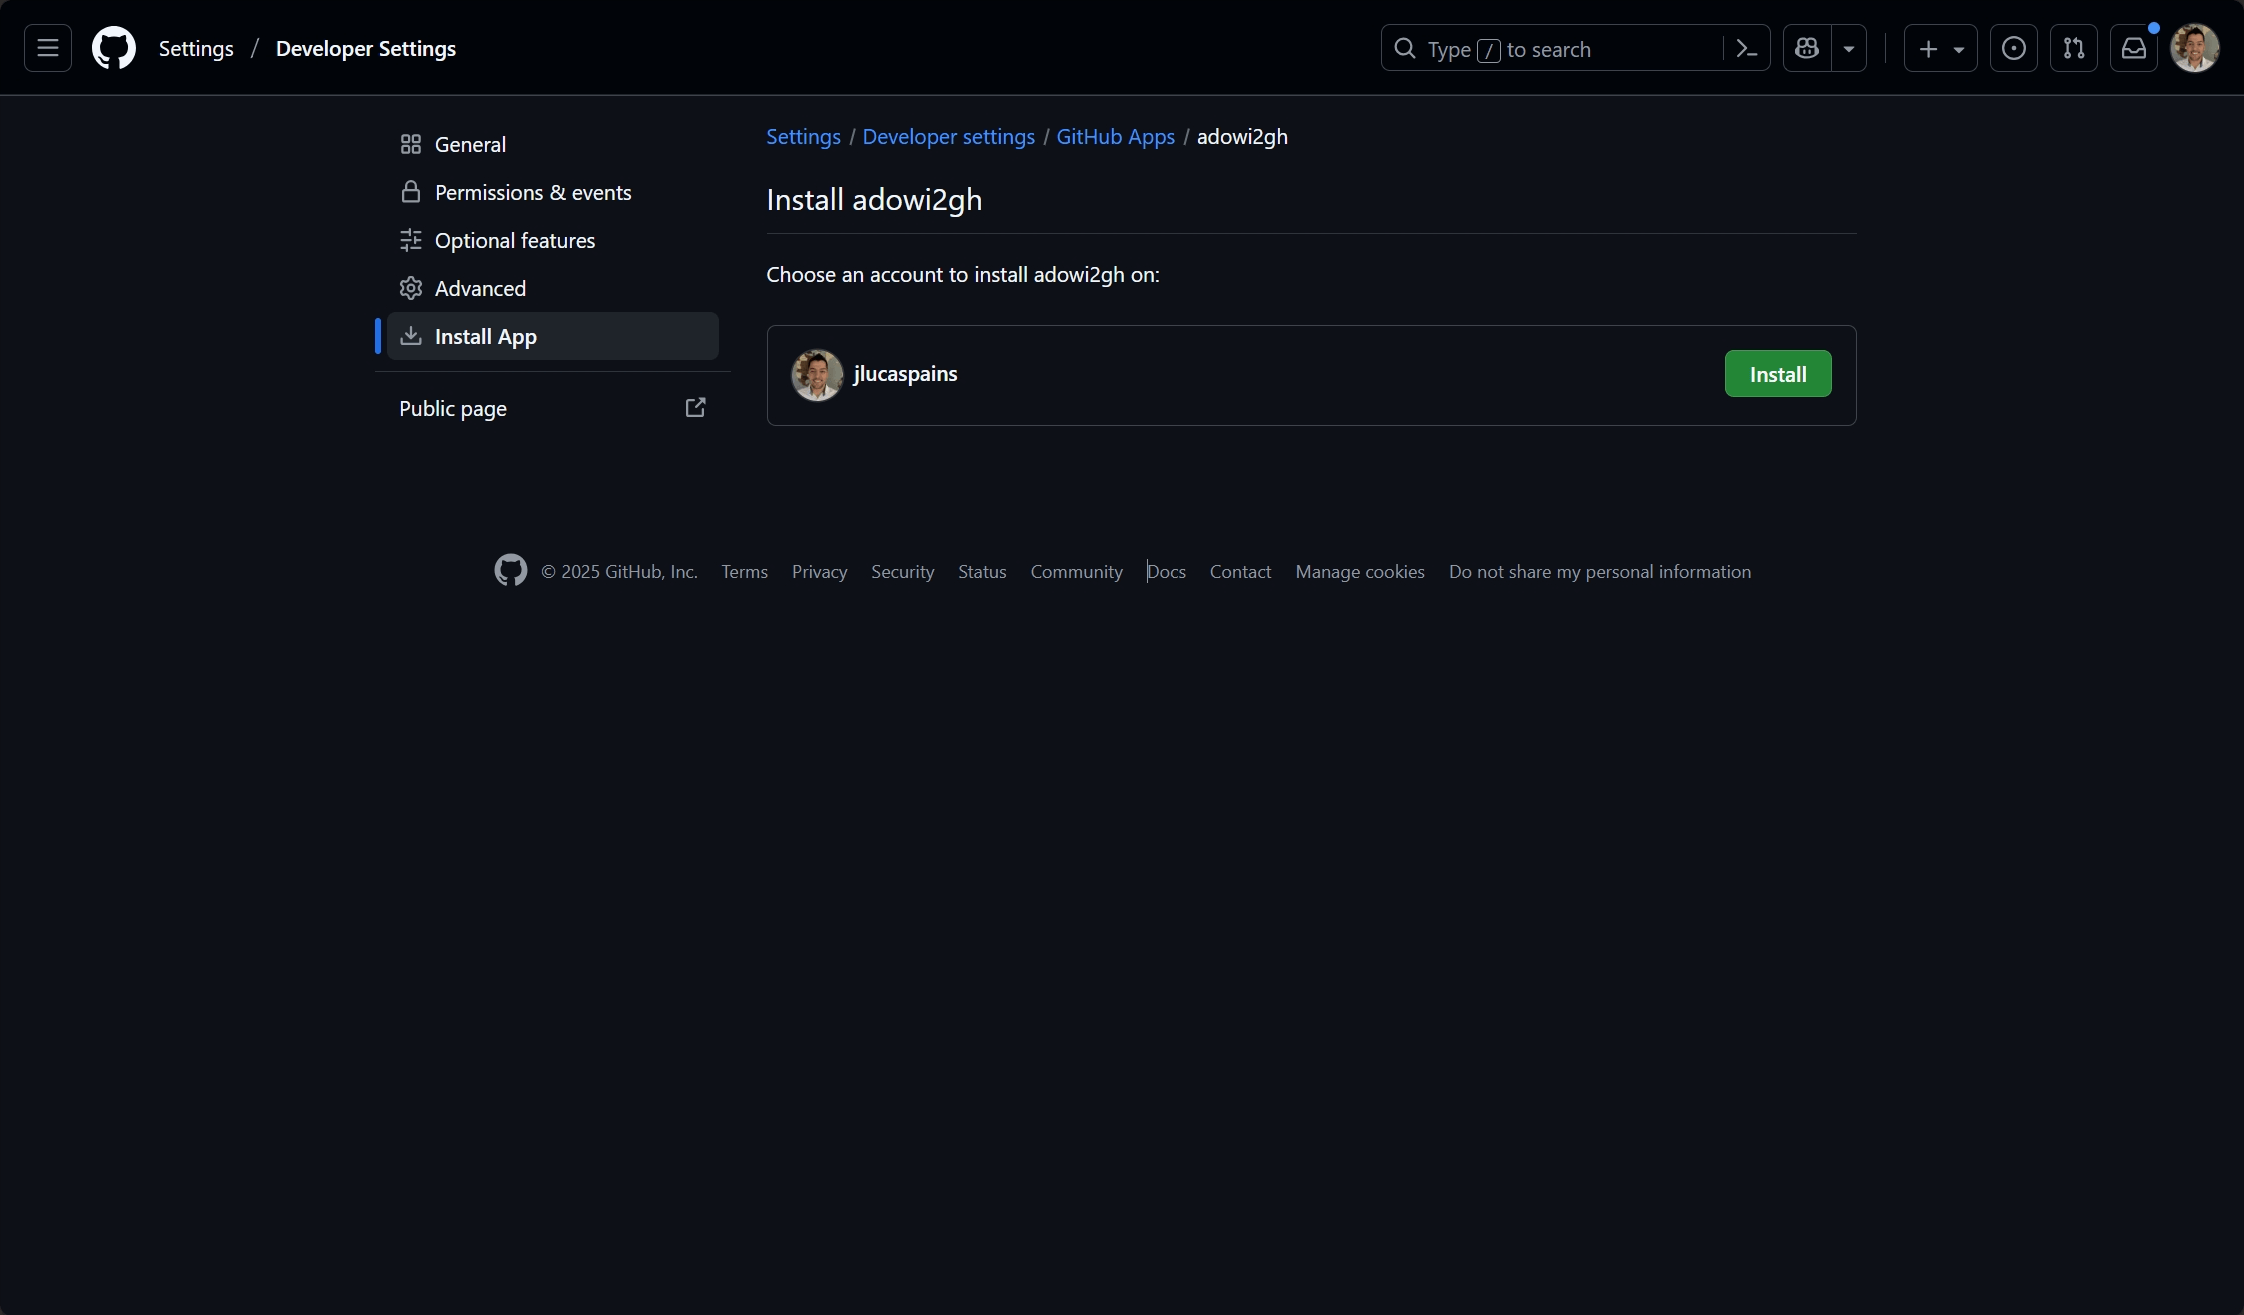
3. Install the app on your repositories
After creating the app, you need to install it on the target repositories where you want to import work items:
- Navigate to your app’s settings page
- Click “Install App” in the left sidebar
- Choose the account (organization or personal) where you want to install the app
- Select the repositories where the app should have access:
- All repositories: Grants access to all current and future repositories
- Selected repositories: Choose specific repositories for more granular control
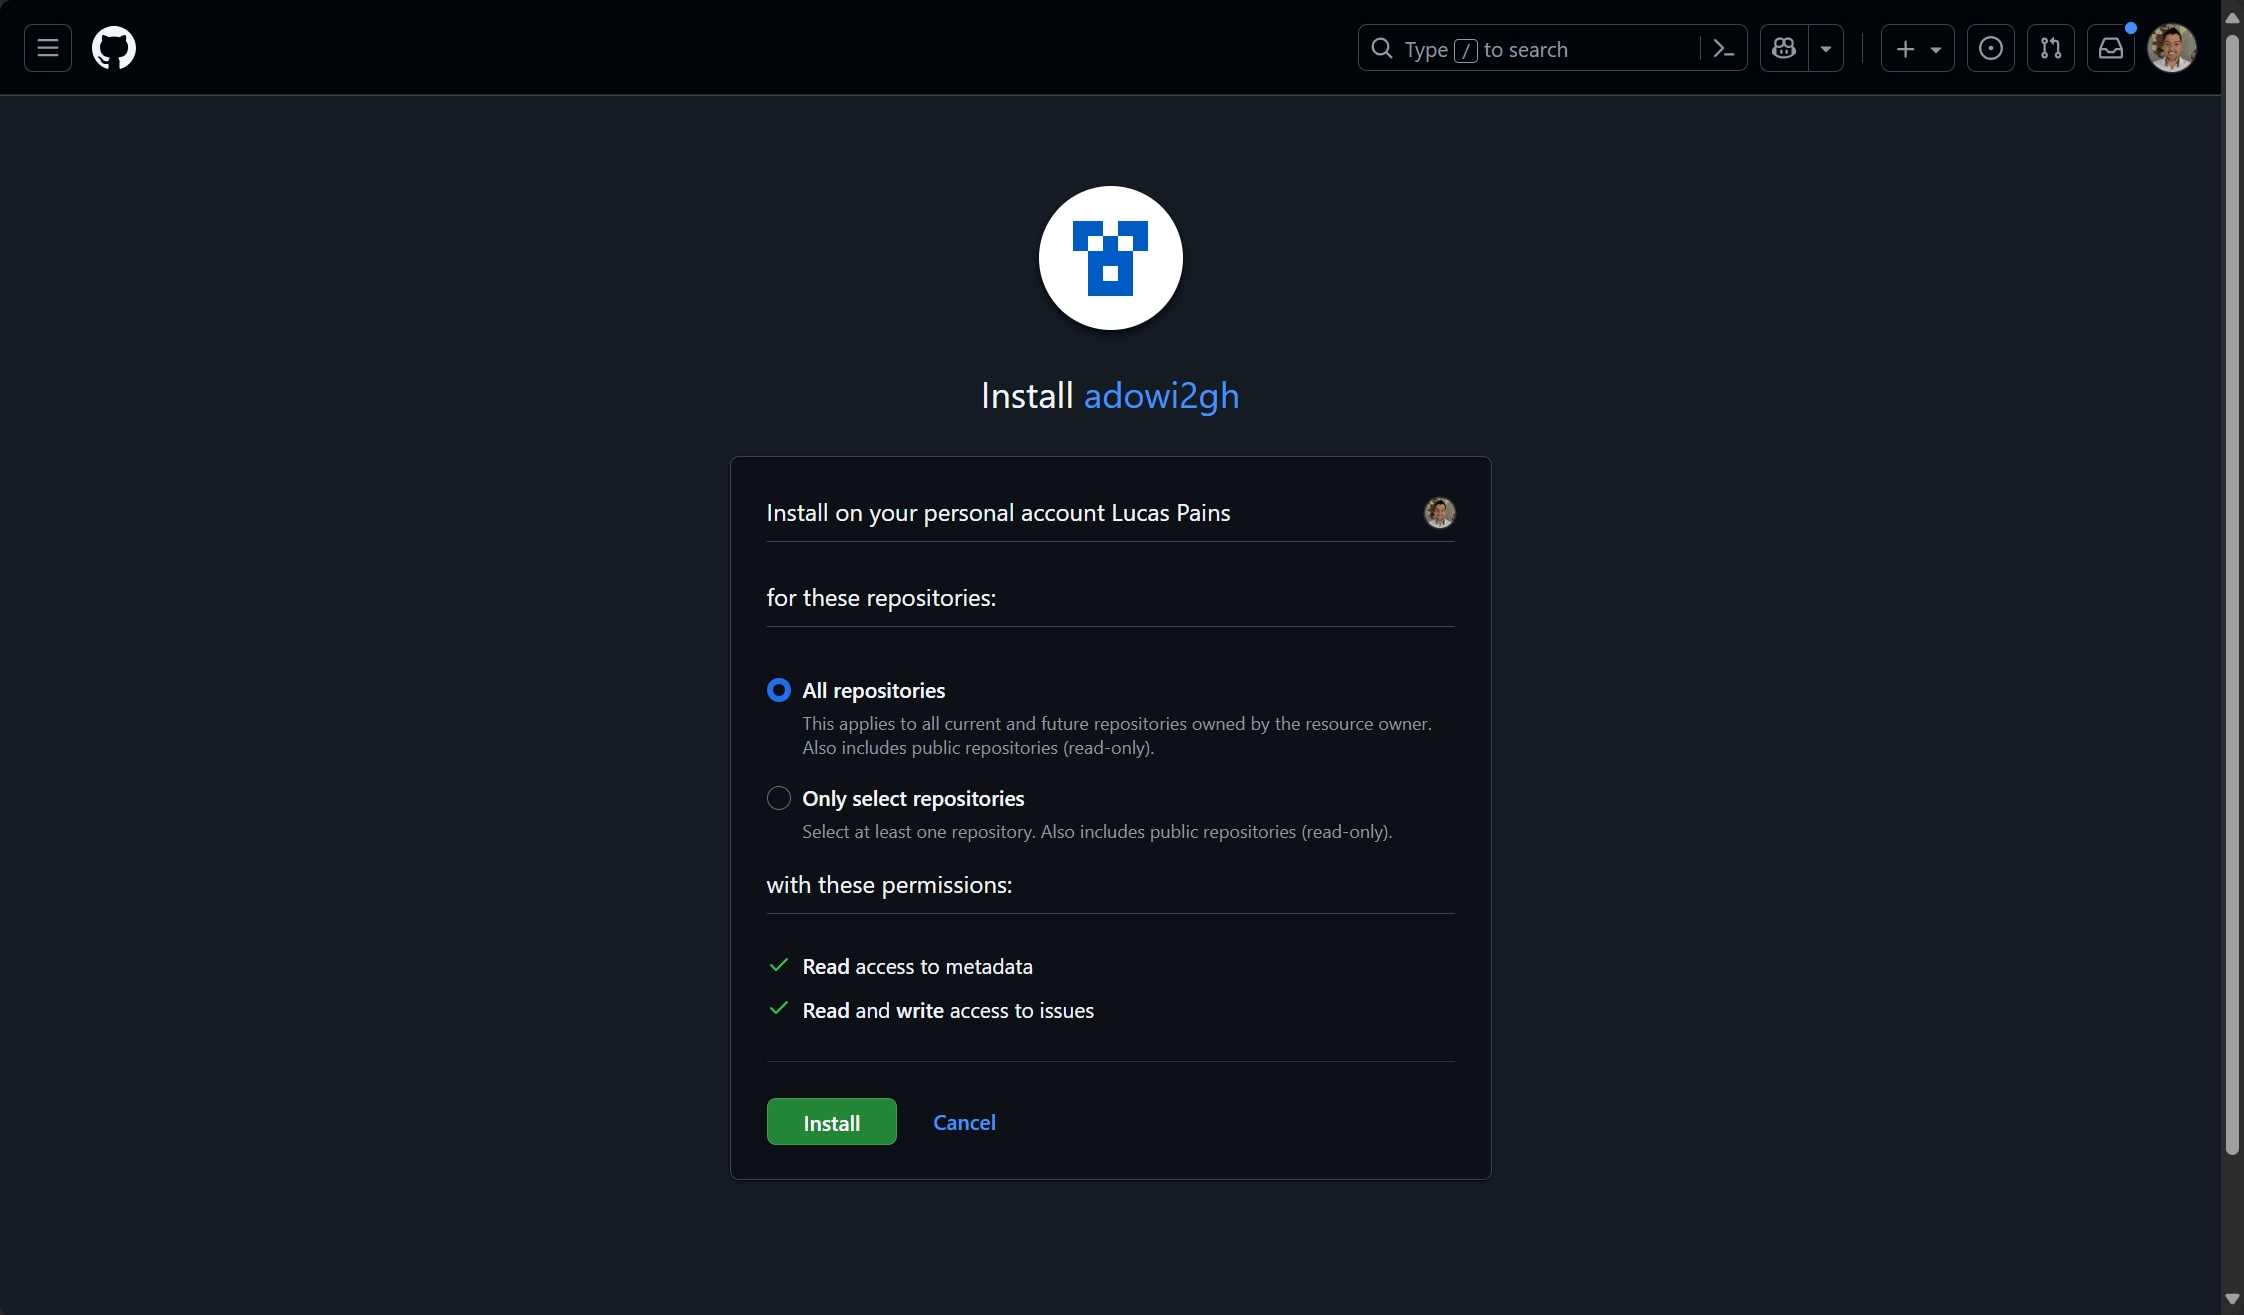
Security note: Follow the principle of least privilege and only grant access to repositories that need work item imports.
4. Generate and secure your private key
GitHub Apps can either authenticate on behalf of a user, or as an app installation. The second authentication method attributes activities to the app itself and not to a user. To authenticate as an app installation, a private key is needed:
- In your app’s settings, scroll down to “Private keys”
- Click “Generate a private key”
- Download the generated
.pemfile - Store the file securely on your local machine
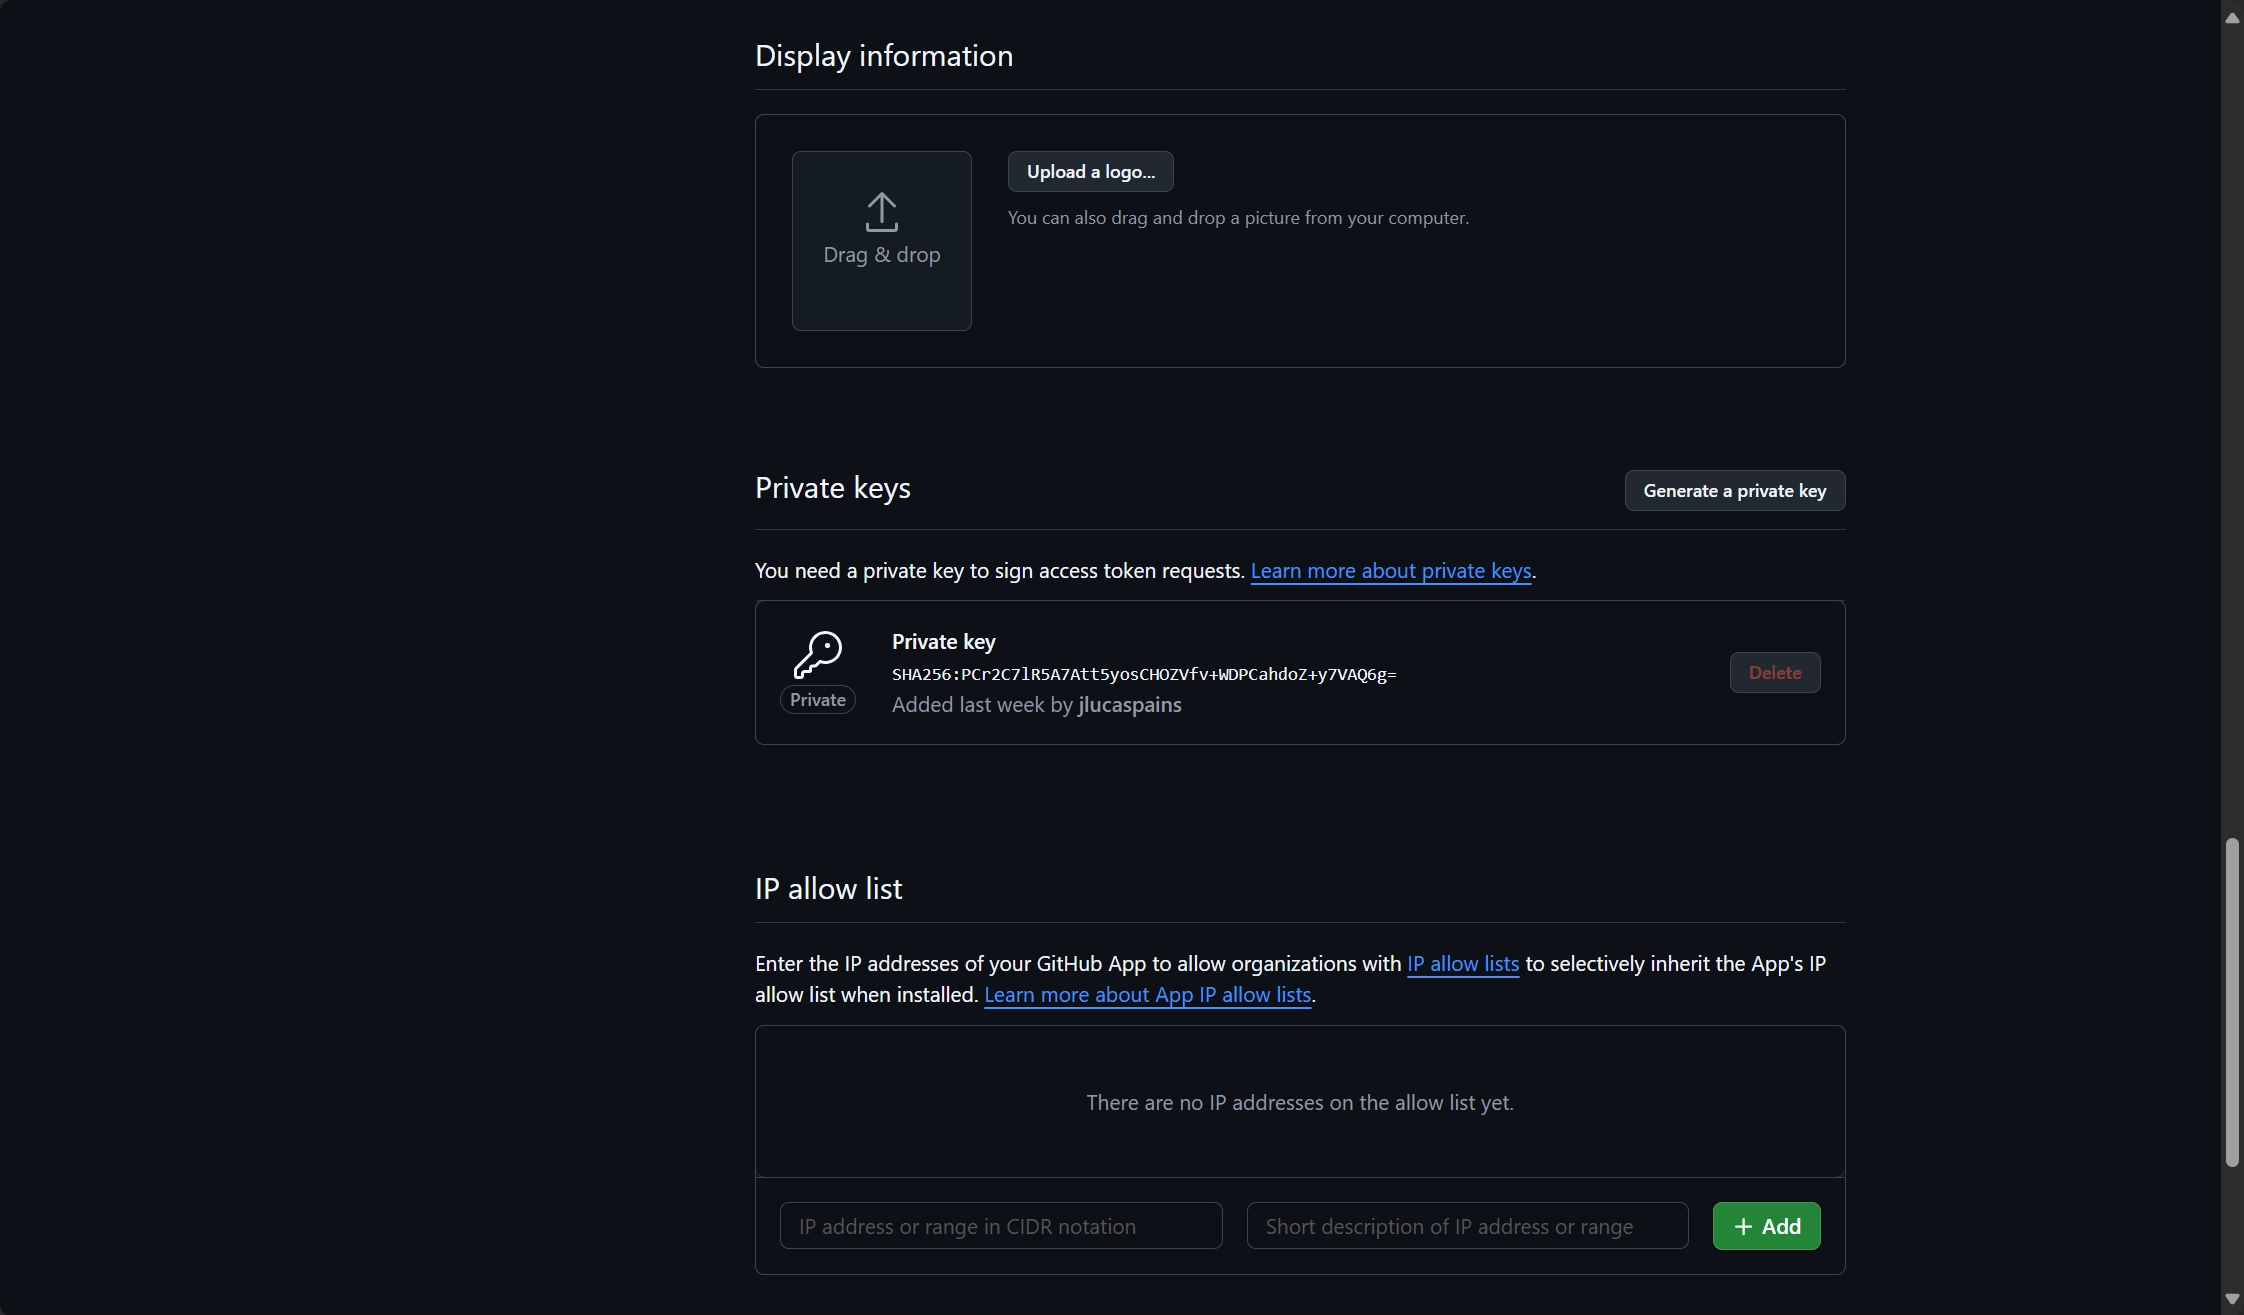
Critical security warning: Never commit private key files to source control. Store them securely and restrict access to authorized personnel only.
5. Gather required credentials
You’ll need three pieces of information to configure adowi2gh with your GitHub App:
- App ID: Found in your app’s settings page under “About”
- Installation ID: Found in the URL when viewing your app installation (e.g.,
https://github.com/settings/installations/12345678) - Private key file path: The location where you saved the
.pemfile
For detailed information about GitHub App authentication, see GitHub’s authentication documentation.
Using adowi2gh with GitHub App authentication
Now that your GitHub App is configured, you can use it with adowi2gh for work item migration.
Installation
Install the latest version of adowi2gh using Go:
| |
Configuration
Create a configuration file that uses GitHub App authentication instead of a Personal Access Token. Here’s an example basic configuration:
| |
Running the migration
Test your configuration with a dry run:
1adowi2gh migrate --config .\configs\config.yaml --verbose --dry-runExecute the migration:
1adowi2gh migrate --config .\configs\config.yaml --verboseVerify the results by checking your GitHub repository for newly created issues
Next steps
For comprehensive migration guidance, including repository and pipeline migration, check out my complete guide to moving from Azure DevOps to GitHub.
For detailed configuration options and advanced features, refer to the adowi2gh documentation.
Cheers,
Lucas